Damp problems affect thousands of properties across Sutton every year, causing damage, health issues, and significant repair costs. As surveyors specializing in building defects, we regularly encounter both rising damp and penetrating damp during property inspections. Understanding the differences between these two common moisture problems is essential for effective diagnosis and treatment.
What is Rising Damp?
Rising damp occurs when groundwater moves upwards through porous building materials via capillary action. In properties built before 1875, rising damp is common because damp proof courses (DPC) weren't mandatory. Even in newer properties with DPCs, the barrier can fail, become bridged, or deteriorate over time.
Key Characteristics of Rising Damp:
- Height limitation: Rarely rises above 1.2 meters (4 feet) from ground level
- Affected areas: Ground floor walls, particularly solid brick/masonry construction
- Pattern: Horizontal tide mark with salt deposits and plaster damage
- Smell: Musty, damp odor in affected rooms
- Appearance: Staining, peeling wallpaper/paint, crumbling plaster at skirting board level
- Seasonal variation: Worsens in winter months when ground is wetter
Common Causes of Rising Damp:
- Absent damp proof course in pre-1875 properties
- Failed or deteriorated DPC in older properties (slate, bitumen, or lead DPCs can fail)
- Bridged damp proof course - external ground levels raised above DPC, rendering applied over DPC
- High ground levels against external walls
- Porous brickwork in older properties without adequate water resistance
- Damaged drainage causing ground saturation near walls
What is Penetrating Damp?
Penetrating damp (also called lateral damp) occurs when water enters a building horizontally through external walls, roofs, or around windows and doors. Unlike rising damp, penetrating damp can affect any level of a property and is usually linked to specific defects in the building envelope.
Key Characteristics of Penetrating Damp:
- Location: Can occur at any height - ground floor through to roof level
- Pattern: Localized patches corresponding to external defects
- Weather-dependent: Appears or worsens during periods of rain, particularly wind-driven rain
- Appearance: Damp patches on walls/ceilings, dark staining, mold growth
- Direction: Horizontal penetration from outside to inside
- Specific areas: Around windows, under windowsills, at roof junctions, chimney breasts
Common Causes of Penetrating Damp:
Roof-Related Issues:
- Missing, slipped, or damaged roof tiles/slates
- Failed or deteriorated roof flashings (around chimneys, valleys, abutments)
- Blocked or damaged guttering causing overflow
- Defective roof valleys allowing water ingress
- Poor flat roof coverings (felt, asphalt) with splits or blistering
Wall-Related Issues:
- Defective external rendering with cracks allowing water entry
- Porous brickwork, particularly in exposed locations
- Failed or missing pointing between bricks
- Cracked or missing mortar joints
- Cavity wall tie corrosion creating cold bridges
- Cavity wall insulation issues causing moisture transfer
Window & Door Issues:
- Failed sealant around window/door frames
- Defective window sills without proper drips
- Poorly fitted replacement windows
- Gaps in external cladding or timber weatherboarding
Key Differences: Rising Damp vs Penetrating Damp
| Factor | Rising Damp | Penetrating Damp |
|---|---|---|
| Source | Ground moisture | External defects |
| Direction | Vertical (upward) | Horizontal (inward) |
| Height | Up to 1.2m maximum | Any height |
| Pattern | Horizontal tide mark | Localized patches |
| Weather Link | Indirect (worse in wet seasons) | Direct (appears/worsens with rain) |
| Salt Deposits | Common (hygroscopic salts) | Less common |
How Surveyors Diagnose Damp Problems
During building surveys in Sutton, our surveyors use multiple diagnostic methods to accurately identify damp sources:
Professional Diagnostic Methods:
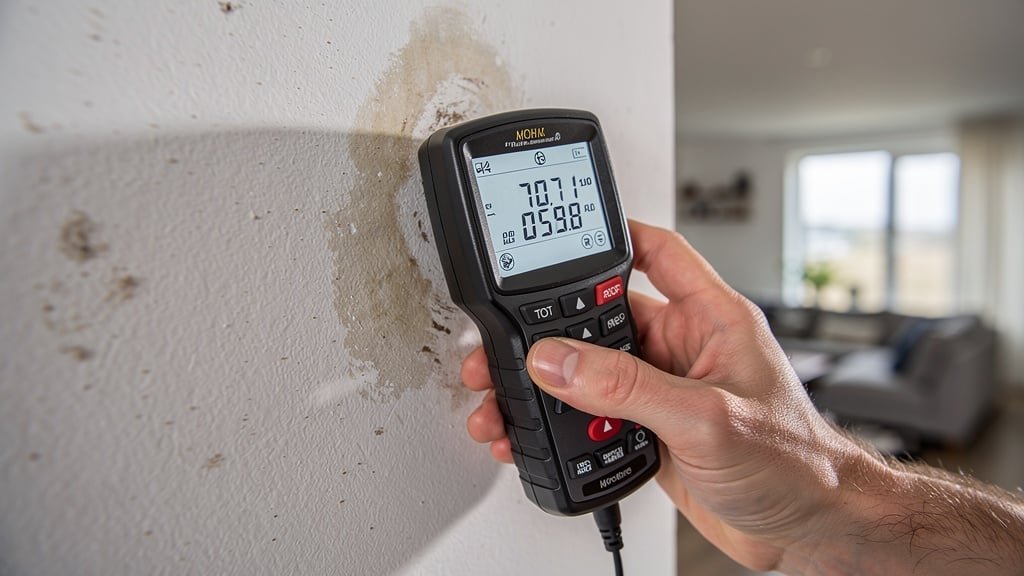
Moisture Meters
Electronic resistance meters and capacitance meters measure moisture content in walls, providing quantitative data on dampness levels and distribution patterns.
Visual Inspection
Examining damp patterns, heights, locations, salt deposits, plaster condition, and external building fabric to identify likely sources.
Salt Analysis
Laboratory testing of wall samples to identify salt types - hygroscopic salts indicate rising damp; chlorides and nitrates suggest other sources.
Thermal Imaging
Infrared cameras detect temperature differences caused by moisture, helping identify hidden damp and water ingress paths.
Treatment & Remediation
Treating Rising Damp:
DPC Installation/Repair (£1,500-£3,000+):
- Chemical DPC injection: Silicone/cream injected into mortar joints to create moisture barrier
- Physical DPC installation: Cutting wall sections to insert new damp proof membrane
- Electro-osmotic systems: Electronic devices that reverse moisture flow (less common)
Additional Works Required:
- Remove affected plaster to minimum 1m above highest damp reading
- Apply salt-neutralizing render or replastering with waterproof additives
- Replace damaged skirting boards and decorative finishes
- Allow adequate drying time (several months) before redecoration
Treating Penetrating Damp:
Treatment focuses on identifying and repairing the source defect:
- Roof repairs: Replace damaged tiles/slates, repair flashings, clear gutters (£500-£5,000+)
- Repointing: Rake out and renew defective mortar joints (£50-£100/m²)
- Rendering repairs: Patch or renew failed external render (£40-£80/m²)
- Window repairs: Reseal frames, install drips, replace sills (£200-£800 per window)
- Wall treatment: Apply water-repellent masonry cream or silicone-based sealants (£30-£50/m²)
- Cavity wall issues: Extract failed insulation, install cavity trays (£2,000-£6,000+)
Important: Always address the underlying cause before cosmetic repairs. Simply redecorating over damp will not solve the problem - moisture will return, potentially causing worse damage. Our surveyors provide detailed remediation specifications with all damp reports.
Prevention Tips
Preventing Rising Damp:
- Maintain minimum 150mm gap between external ground level and DPC
- Don't build garden beds/patios above DPC level
- Ensure external rendering doesn't bridge the DPC
- Keep drains clear and repair any leaks promptly
- Maintain adequate ventilation to external walls (airbricks)
Preventing Penetrating Damp:
- Annual roof inspections - replace damaged tiles immediately
- Keep gutters and downpipes clear of debris
- Repoint brickwork when mortar shows signs of deterioration
- Inspect and maintain external sealants around windows
- Repair render cracks before they allow water penetration
- Consider breathable water-repellent treatments on exposed walls
Concerned About Damp in Your Property?
Our RICS surveyors provide expert damp surveys with detailed diagnostic reports and treatment recommendations.
Book Your Damp SurveyFrequently Asked Questions
About the Author
Sarah Matthews MRICS
Senior Building Surveyor
Sarah has over 12 years' experience diagnosing and treating damp problems in period and modern properties across South London. She specializes in complex damp investigations and has helped hundreds of homeowners in Sutton resolve moisture issues effectively.